how to install and setup Jenkins on azure ubuntu VM (Complete guide) for free
Jenkins:
Jenkins is a powerful open-source automation server that allows developers to build, test, and deploy their software projects continuously. Azure provides a reliable and scalable infrastructure for hosting virtual machines (VMs) that can be utilized to set up Jenkins for your project's continuous integration and delivery needs. In this step-by-step guide, we will walk you through the process of installing and configuring Jenkins on an Azure Ubuntu VM, ensuring a smooth and efficient setup.
Prerequisites:
You must have an Azure account to proceed, you can create an Azure account for free by signing up for a free trial
Step 1: Provisioning an Azure Ubuntu VM:
Sign in to the Azure Portal (portal.azure.com).
Create a new Ubuntu VM by navigating to "Virtual machines" and clicking on "Add."
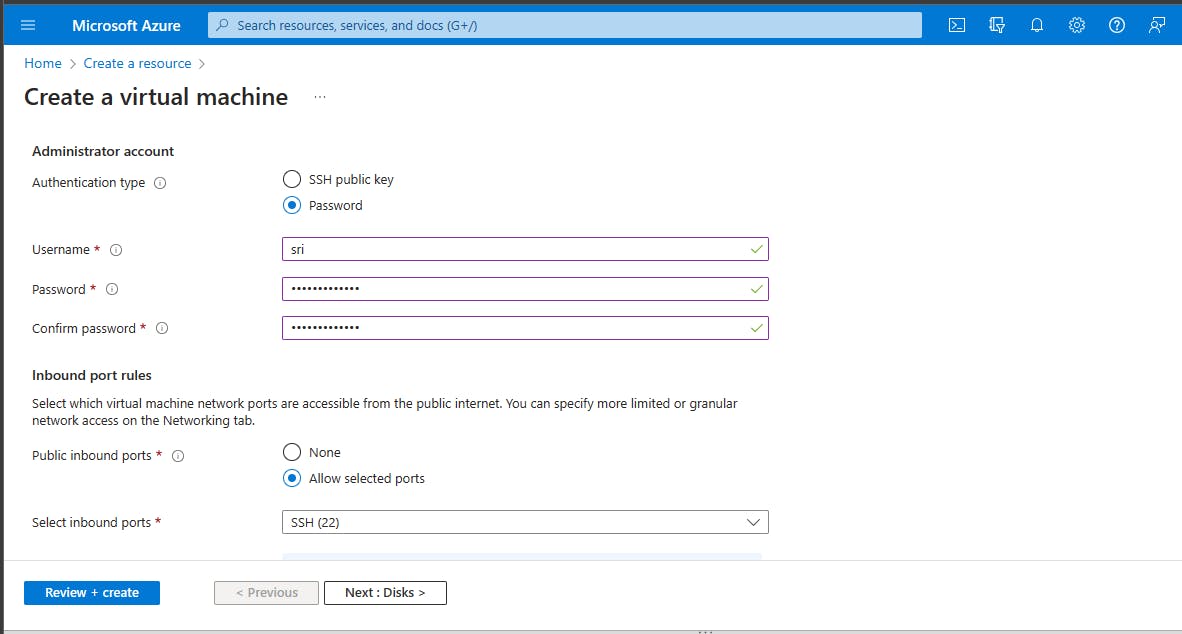
In administrator, use Password instead of SSh public key
note that we will be using the username and password later for authentication.
Follow the instructions to specify VM details such as resource group, region, size, authentication, etc.
after setting up your VM open your virtual machine in Azure and click on Connect
as you can see below copy your <username>@ <your vm ip>
Now open your personal Linux terminal or you can use Azure shell (you can find it in the top icons) and do the following:
This is the Debian package repository of Jenkins to automate installation and upgrade. To use this repository, first add the key to your system:
login to your vm on a shell:
replace <yourusername> and <your ip> with yours (which we copied earlier)
ssh <yourusername>@<your ip>This is the Debian package repository of Jenkins to automate installation and upgrade. To use this repository, first add the key to your system:
  curl -fsSL https://pkg.jenkins.io/debian-stable/jenkins.io-2023.key | sudo tee \
    /usr/share/keyrings/jenkins-keyring.asc > /dev/null
Then add a Jenkins apt repository entry:
  echo deb [signed-by=/usr/share/keyrings/jenkins-keyring.asc] \
    https://pkg.jenkins.io/debian-stable binary/ | sudo tee \
    /etc/apt/sources.list.d/jenkins.list > /dev/null
Update your local package index, then finally install Jenkins:
  sudo apt-get update
  sudo apt-get install fontconfig openjdk-11-jre
  sudo apt-get install jenkins
Step 2: Starting and Enabling Jenkins:
Start the Jenkins service:
sudo systemctl start jenkinsEnable Jenkins on startup:
sudo systemctl enable jenkins
Check status:
systemctl status jenkinsif it shows active and running we are good to go.
now we have to set up the firewall:
sudo ufw allow 8080
Step 3: Configuring Jenkins:
Open a web browser and access Jenkins by entering your VM's public IP address followed by port 8080 (e.g., http://your_vm_public_ip:8080).
if your IP is not working you will need to add an inbound rule to access.In the inbound rule in the Azure portal keep everything as default and only change the destination port range to 8080
now you are good to go with your ip:8080
You will be asked for a password, get it at:
sudo cat /var/lib/jenkins/secrets/initialAdminPasswordDone! Copy and paste the key in Jenkins and you are good to go!
